Layered Nativity Ornament: Elevating Holiday Decor with Digital Craftsmanship
The holiday season is often defined by a tension between tradition and modern convenience. For many, the desire to create meaningful, handcrafted decorations clashes with the limited time available during the busy winter months. This is where the concept of the Layered Nativity Ornament emerges as a compelling solution, bridging the gap between artisanal quality and digital efficiency. It represents more than just a festive decoration; it signifies a shift in how creators, hobbyists, and small business owners approach seasonal crafting. By leveraging precision-cut files and layered design principles, individuals can produce sophisticated, three-dimensional art pieces that honor the classic nativity scene while embracing contemporary making techniques.
The Evolution of Digital Crafting in Holiday Traditions
In recent years, the crafting landscape has undergone a significant transformation. The rise of accessible desktop cutting machines—such as Cricut, Silhouette, and various laser cutters—has democratized production capabilities that were once reserved for industrial workshops. This technological shift has changed user expectations. Today’s makers do not merely want to assemble pre-packaged kits; they seek customizable, high-quality designs that allow for personal expression without requiring advanced manual carving or sculpting skills.
The Layered Nativity Ornament fits perfectly into this modern workflow. It utilizes the power of vector graphics to break down a complex image into manageable, stackable components. This method, known as layering, creates depth and shadow, turning a flat material into a dynamic 3D object. As consumers increasingly value unique, handmade items over mass-produced plastic decor, the demand for such digital assets has surged. This trend is not limited to hobbyists; entrepreneurs and educators are also adopting these tools to create scalable products for markets, classrooms, and community events.
Understanding the Layered Design Process
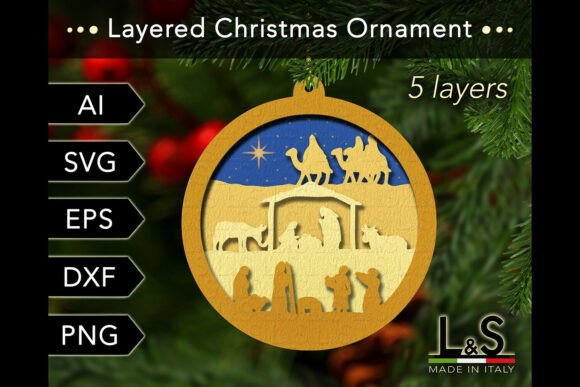
At its core, a layered ornament is built on the principle of spatial separation. Instead of printing a single image, the design is split into multiple distinct layers. In the case of this specific nativity scene, the design consists of five layers. Each layer represents a different plane of the image, from the background elements to the foreground figures. When stacked with slight spacing or adhesive foam tabs, these layers cast subtle shadows on one another, creating a sense of volume and realism that flat prints cannot achieve.
This approach offers several practical advantages. First, it simplifies the cutting process. Complex details are distributed across separate pieces, reducing the risk of material tear or machine error. Second, it allows for creative experimentation with materials. Because each layer is independent, creators can mix textures and colors. For instance, one might use a dark walnut plywood for the base layer to create depth, while using lighter birch or even translucent acrylic for the upper layers to catch the light differently. This flexibility makes the Layered Nativity Ornament a versatile canvas for artistic exploration.
Material Versatility and Technical Compatibility
One of the most significant benefits of using ready-to-cut digital files is their compatibility with a wide range of machinery and materials. Whether you are operating a diode laser cutter, a CO2 laser, a CNC router, or a blade-based cutting machine like a Cricut or Silhouette, the underlying vector data remains consistent. This universality ensures that the design is accessible to a broad audience, regardless of their specific equipment.
The choice of material dramatically influences the final aesthetic. For a rustic, traditional look, plywood and MDF are excellent choices. They offer warmth and texture, aligning well with the historical context of the nativity story. For a modern, sleek appearance, acrylic or plexiglas can be used. These materials allow for vibrant colors and a glossy finish that reflects holiday lights beautifully. Even simple paper or cardstock can be employed for lightweight, cost-effective ornaments, ideal for classroom projects or large-scale tree decorations.
The scalability of the design further enhances its utility. With a base size of 4x4 inches (10x10 cm), the file can be resized to fit various needs without losing resolution. This is crucial for professionals who may need to produce both small gift tags and larger wall hangings from the same source file. The ability to scale ensures that the intricate details of the five-layer structure remain sharp and precise, regardless of the final dimensions.
Navigating File Formats for Seamless Production
For those new to digital crafting, the variety of file formats included in a comprehensive download can seem overwhelming. However, each format serves a specific purpose in the workflow, ensuring compatibility across different software ecosystems. Understanding these formats is key to a smooth creation process.
- SVG Files: Scalable Vector Graphics are the industry standard for most consumer cutting machines. They are compatible with Cricut Design Space, Silhouette Studio, and many other platforms. SVGs preserve the vector paths, allowing for clean cuts at any size.
- AI and EPS Files: These formats are essential for users working with professional vector software like Adobe Illustrator or Inkscape. They allow for deeper editing, such as adjusting node points, modifying layer spacing, or changing color profiles before sending the design to the cutter.
- DXF Files: Drawing Exchange Format files are particularly useful for users of Silhouette Studio Basic Edition, which does not support SVG imports in its free version. DXF ensures that even users with entry-level software can access the design.
- PNG Files: While primarily raster images, the included 300 dpi PNGs with transparent backgrounds are valuable for previewing the design, creating digital mockups for online listings, or using with printers that do not support vector inputs.
All these files are typically compressed into a single ZIP file. It is important to note that users must extract these files before attempting to open them. Trying to access the contents directly from the compressed folder can lead to software errors or corrupted data. Once extracted, the included PDF instructions provide a roadmap for assembly, guiding the user through the layering process to ensure the final ornament looks polished and professional.
Practical Implications for Creators and Businesses
For entrepreneurs and small business owners, the Layered Nativity Ornament represents a viable product opportunity. The low material cost combined with the high perceived value of handmade, 3D decor allows for healthy profit margins. Furthermore, the digital nature of the product means that inventory can be managed efficiently. There is no need to store thousands of pre-made items; instead, creators can produce on demand, reducing waste and storage costs.
Educators and community leaders also find value in these designs. The step-by-step assembly process teaches spatial reasoning and fine motor skills. Additionally, the nativity theme offers a cultural and historical touchpoint for discussions during the holiday season. By providing a structured yet creative activity, these ornaments serve as both educational tools and festive keepsakes.
From a lifestyle perspective, engaging in this type of crafting offers a mindful break from digital screens. The tactile experience of selecting materials, watching the machine cut, and carefully assembling the layers provides a sense of accomplishment and calm. In an era of rapid consumption, taking the time to build a Layered Nativity Ornament reconnects individuals with the tangible joy of creation.
Recommendations for Best Results
To achieve the best outcome with your layered nativity scene, consider the following recommendations. First, always perform a test cut on a scrap piece of your chosen material. This helps calibrate the machine’s pressure and speed, ensuring clean edges without burning or tearing. Second, pay attention to the spacing between layers. Using foam adhesive squares or small spacers can enhance the 3D effect, allowing light to penetrate between the layers and create deeper shadows.
Finally, experiment with finishing techniques. A light sanding can smooth rough edges on wood, while a clear sealant can protect the material and enhance its natural grain. For acrylic, polishing the edges can restore clarity and brilliance. These small touches elevate the ornament from a simple craft project to a heirloom-quality decoration.
In conclusion, the Layered Nativity Ornament is more than a seasonal item; it is a testament to the fusion of tradition and technology. By utilizing versatile digital files and modern cutting tools, creators can produce meaningful, beautiful decor that resonates with contemporary aesthetics while honoring timeless stories. Whether for personal enjoyment, educational purposes, or commercial venture, this design offers a flexible, engaging, and rewarding crafting experience.